Step 1
Dig a Trench
Use marking paint to spray out the shape of your creek bed, making it look as natural as possible; use curves rather than straight lines. If you have a large landmark that you want to use as a focal point, build the mouth of the creekbed there.
Dig a trench along your mark, between two and three feet deep, using the soil you dig out to build up planting mounds on both sides of the creek (Image 1). A rototiller can help to dig out the trench (Image 2).
Step 2

Set Large Boulders
Use rocks and boulders of different sizes, from 14 inches in diameter to as large as you want to go, keeping in mind the size of your creek bed and your yard. For a more natural look, dig out a depression for the boulder to rest in; remember to showcase the rock’s best side. Then, pack more soil around the sides of the boulder to keep it from moving. Rather than lining the sides of the creek bed with rocks, create clusters of different size boulders along the river’s edge for a more natural look.
If you want to facilitate the growth of moss on the rocks, spray them with buttermilk and place the rocks in a moist, shady area.
Step 3
Install Weed Fabric
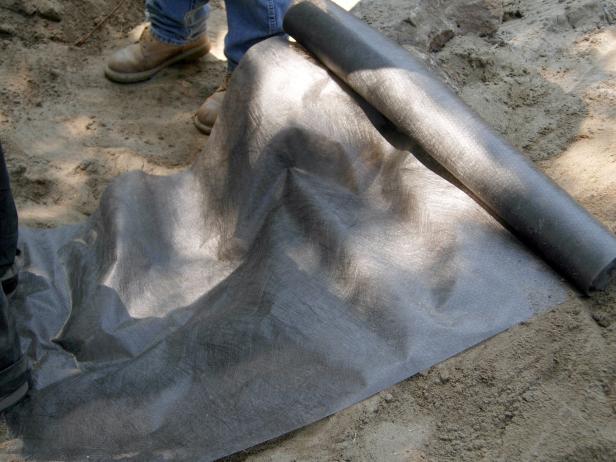
Line the inside of the creek with weed fabric to prevent weeds from popping up (Image 1). Cut out sections so that it goes right up to and around the boulders, overlapping it for complete coverage (Image 2).
Step 4

Fill with River Cobble
Most rock yards will carry a mixture of different size cobbles and flat stones that, when used together, create the look of a natural creek. These mixes usually consist of either gray or tan tones. Spread the rocks over the sides and bottom of the creek bed until the weed barrier is completely hidden. Use some of the cobble to go up a little past the edge of the creek, creating the look of washouts.


